Vue.js에서 S3버킷으로 파일 업로드 하기
Uploading files to S3 bucket using Vue.js and AWS Cognito
전체 과정 요약
-
퍼블릭 액세스가 가능한 사진을 저장할 S3 버킷을 만든다
-
S3 버킷에 접근 가능하도록 AWS Cognito를 사용해서 자격증명 풀을 만들고 알맞은 권한을 생성해준다
-
Vue.js를 통해 S3로 이미지 파일을 업로드 한다
S3 버킷 생성 및 설정
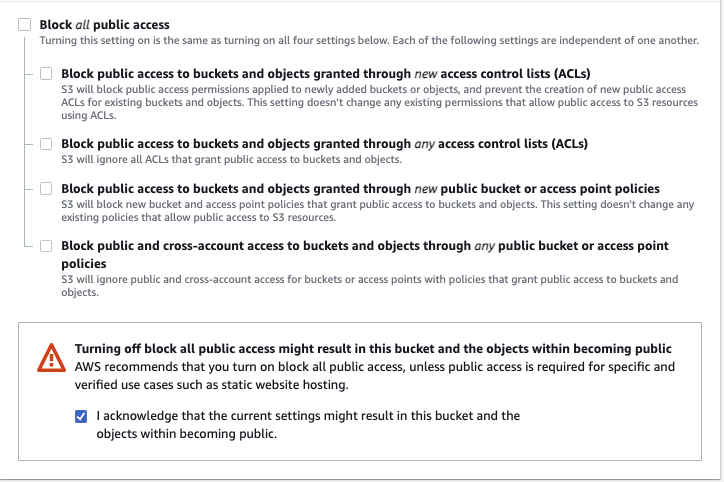
- S3에서 새 버킷을 생성한다 - 모든 값은 default로 두고 block all public access 라는 부분만 체크 해제하고 버킷을 생성한다
-
아래 CORS Configuration Code를 복사해서 S3 –> CORS 편집기에 붙여넣는다
replace with website url 이라고 되있는 부분만 실제 파일을 업로드할 웹사이트의 주소를 넣으면 된다
[
    {
        "AllowedHeaders": [
            "*"
        ],
        "AllowedMethods": [
            "PUT",
            "POST",
            "DELETE"
        ],
        "AllowedOrigins": [
            "<replace with website url>"
        ],
        "ExposeHeaders": []
    },
    {
        "AllowedHeaders": [
            "*"
        ],
        "AllowedMethods": [
            "PUT",
            "POST",
            "DELETE"
        ],
        "AllowedOrigins": [
            "<replace with website url>"
        ],
        "ExposeHeaders": []
    },
    {
        "AllowedHeaders": [],
        "AllowedMethods": [
            "GET"
        ],
        "AllowedOrigins": [
            "*"
        ],
        "ExposeHeaders": []
    }
]
코드 출처: https://docs.aws.amazon.com/sdk-for-javascript/v2/developer-guide/cors.html
Cognito 자격증명 생성 및 설정
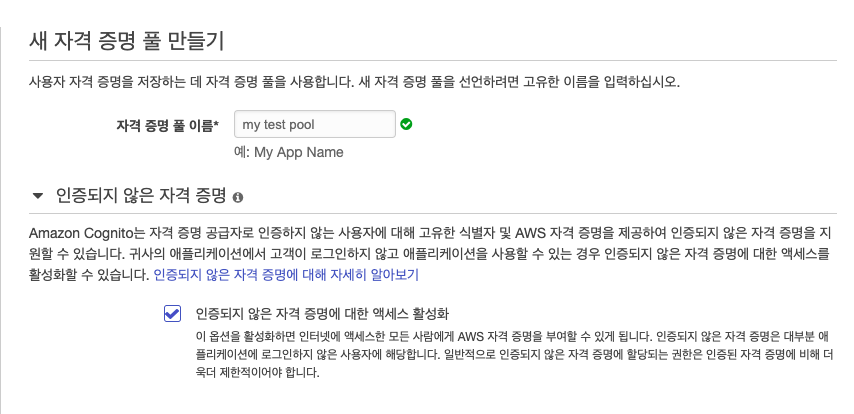
- 새 자격 증명 풀 만들기를 클릭한다
- 인증되지 않은 자격 증명을 체크한다 (이 부분이 웹사이트를 통해 접속자가 접속했을때 s3버킷에 업로드를 할 수 있도록 한다)
-
다음 페이지에서 세부 정보 보기를 열어 Unauthenticated Role의 정책을 다음과 같이 편집한다
Resource 밑에 bucket_name 에 실제 버킷 이름을 넣어준다
{
    "Version": "2012-10-17",
    "Statement": [
        {
            "Effect": "Allow",
            "Action": "s3:*",
            "Resource": [
                "arn:aws:s3:::<bucket_name>",
                "arn:aws:s3:::<bucket_name>/*"
            ]
        }
    ]
}
코드 출처: https://docs.aws.amazon.com/sdk-for-javascript/v2/developer-guide/s3-example-photo-album.html
Vue.js에서 파일 업로드 기능 구현
- Vue에서 aws sdk를 설치해준다
npm install aws-sdk --save
- components –> HelloWorld.vue에서 파일을 선택할 버튼과 올릴 버튼을 만들어준다.
<template>
  <v-container>
    <h1>파일 업로더</h1>
    <input id="file-selector" ref="file" type="file"

    @change="handleFileUpload()">
    <v-btn @click="upload" color="primary">업로드</v-btn>
  </v-container>
</template>
- 파일 업로드를 위한 method들을 생성
<script>
import AWS from 'aws-sdk'

export default{
  // 변수 선언
  data () {
    return {
      file: null,
      BucketName: '<bucket_name>',
      bucketRegion: '<region>',
      IdentityPoolId: '<identity pool id>'
    }
  },


  methods: {
    // 파일 선택 메소드
    handleFileUpload() {
      this.file = this.$refs.file.files[0]
      console.log(this.file, "파일이 선택 되었습니다")
    },
    // 파일 업로드 메소드
    upload() {
      AWS.config.update({
        region: '<region>',
        credentials: new AWS.CognitoIdentityCredentials({
          IdentityPoolId: '<identity pool id>'
        })
      });

			// 업로드 될 s3 버킷 지정
      const s3 = new AWS.S3({
        apiVersion: '2006-03-01',
        params: {
          Bucket: '<bucket name>'
        }
      })

      // 파일 업로드
      let photoKey = this.file.name
      s3.upload({
        Key: photoKey,
        Body: this.file,
        ACL: 'public-read'
      }, (err, data) => {
        if(err) {
          console.log(err)
          return alert('There was an error: ', err.message);
        }
        alert('Successfully uploaded photo.');
        console.log(data)
      })
    }
  }
}
</script>
- 실제 s3 버킷에 사진이 성공적으로 들어갔는지 체크한다.